


This document can help you quickly experience the use of the AP(ESL gateway) and the ESL software.
Step 1 Set up of the AP
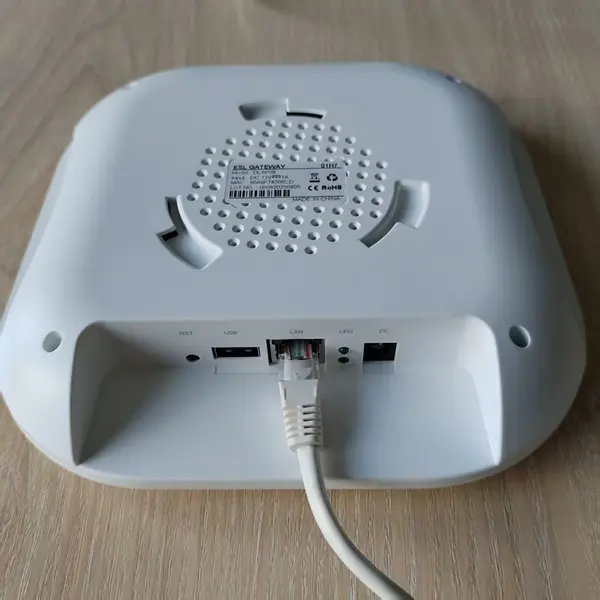
The AP has a PoE interface and is powered via Ethernet cable, it does not have a separate power adapter.
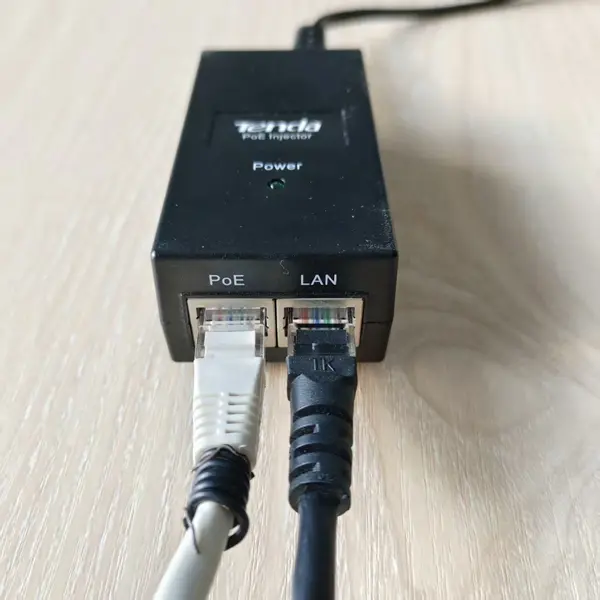
You will need two Ethernet cables to connect the device. For easier identification, the cables in the images above are color-coded: one is white, and the other is black.
White cable: Connect one end to the POE port on the POE Power unit, and the other end to the LAN port on the AP.
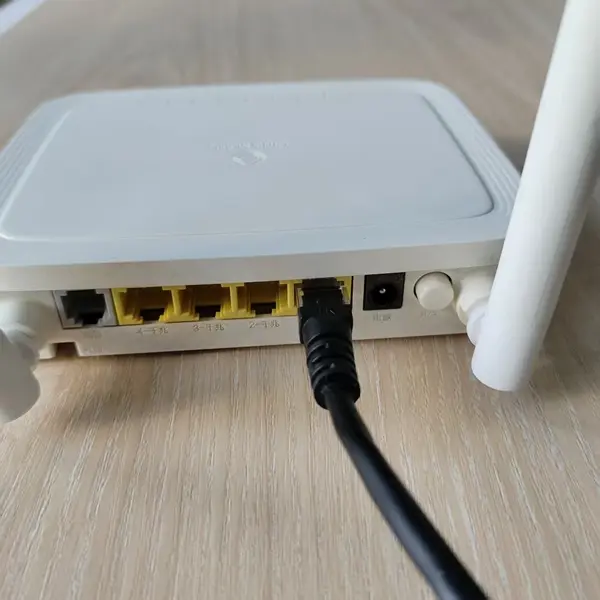
Black cable: Connect one end to the LAN port on the POE Power unit, and the other end to a LAN port on your router or switch.
Step 2 Check the AP online status
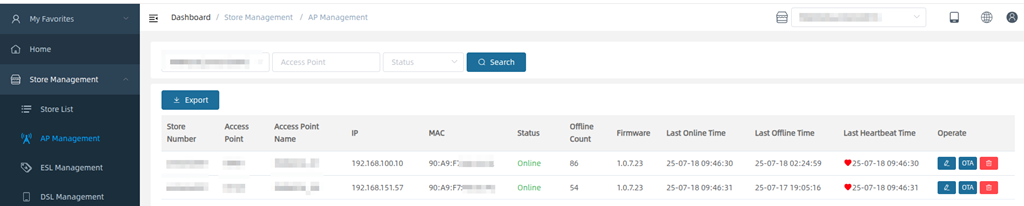
After you power on the AP and connect it to the network, log in to the ESL management system, enter the store management–AP management, and you can check the online status of the AP. As shown in the figure below, it means that the AP is online.
Step 3 Batch import ESL devices
Store management—ESL management—bulk add
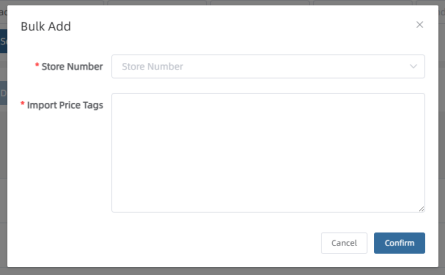
We will add ESL devices to the management system before delivery. You can see these ESLs in the system’s store management—ESL management.
If you need to add ESL devices yourself, you can follow the steps above
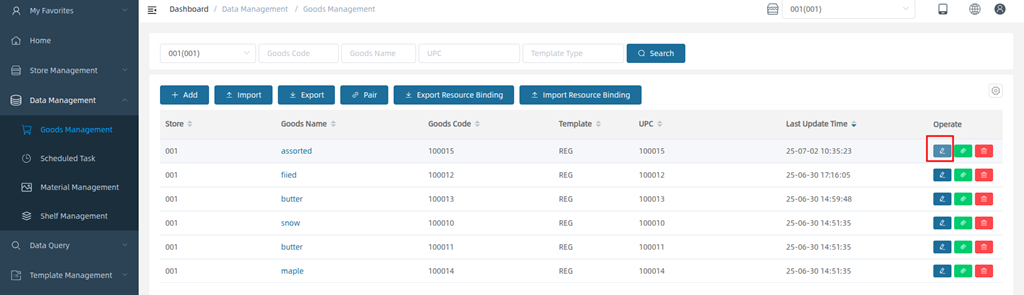
Step 4 Create Goods
Data management—Goods management–Add
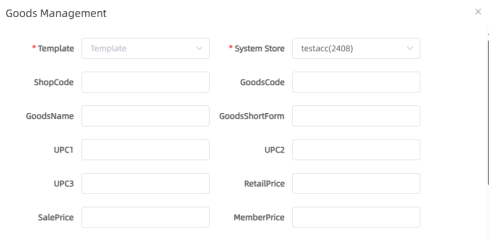
Generally, you can select the template name as REG.
After selecting, you have completed the binding of this product and this template.
Shopcode, GoodsCode and GoodsName are required.
Step 5 Create Templates
ESL template–Add
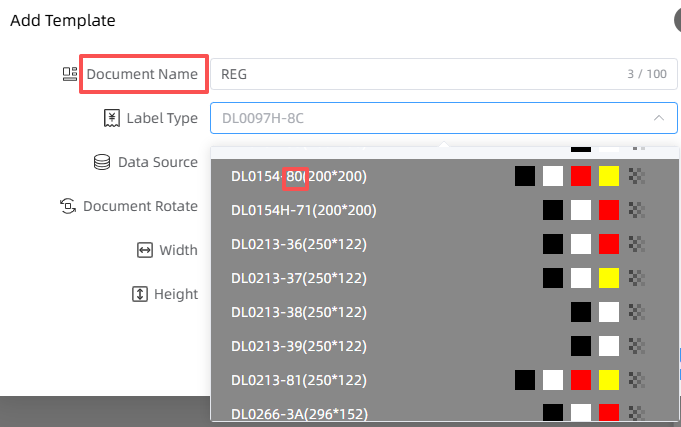
There are 4 points to note here.
1 Here the document name is template name, as the above photo.
2 The template name(document name) can only be one of the system preset names, as shown in the figure below, where REG is used as an example.

3 Input the device code in “Label Type”
you can check the code on the back of your ESL device, as shown below
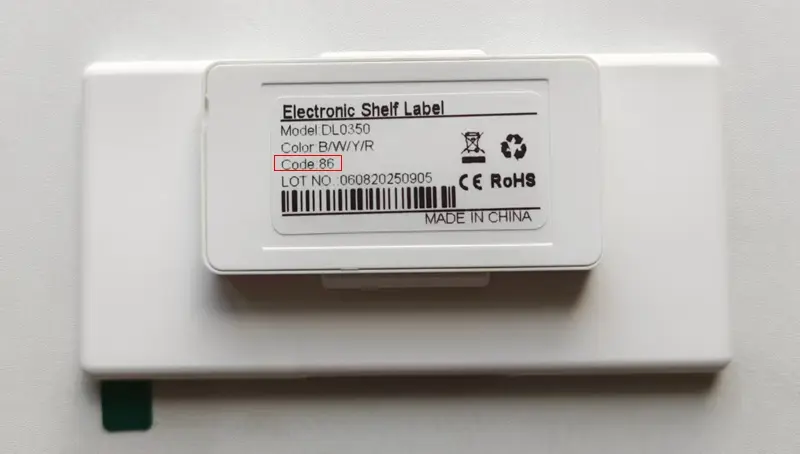
ESL has different sizes and screens have different colors, so we set different device codes. The device code is unique. Multiple devices with the same code can share the same template.
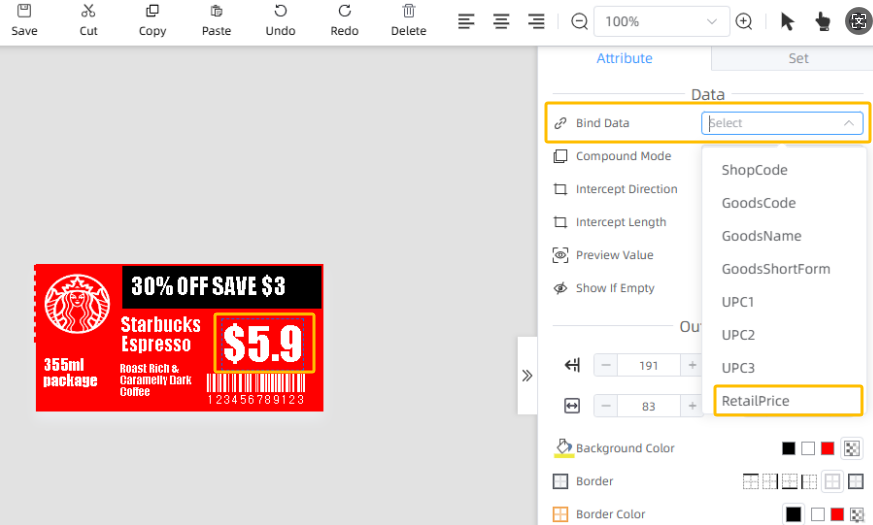
4 When you create the template, the product name, retail price and barcode needs to be bound to the corresponding field, see below 3 yellow mark in the photo
Step 6 Bind Product
ESL management
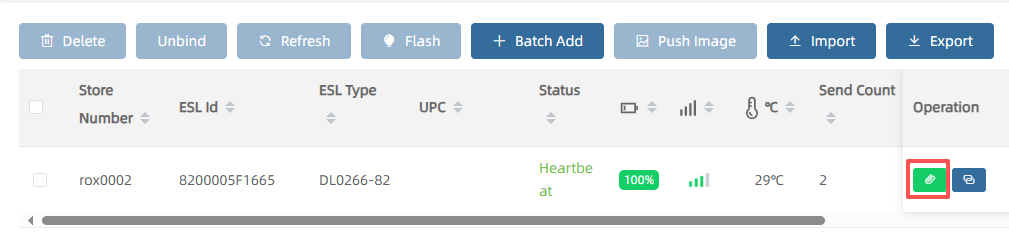

Just input the Goods ID, you can bind the product. Note that the Goods ID here is the GoodsCode. The Goodscode is associated with template name.
Then the ESL screen will be updated.
Step 7 Price Update
Data Management ->Goods Management
Select the product you want to modify, click Edit
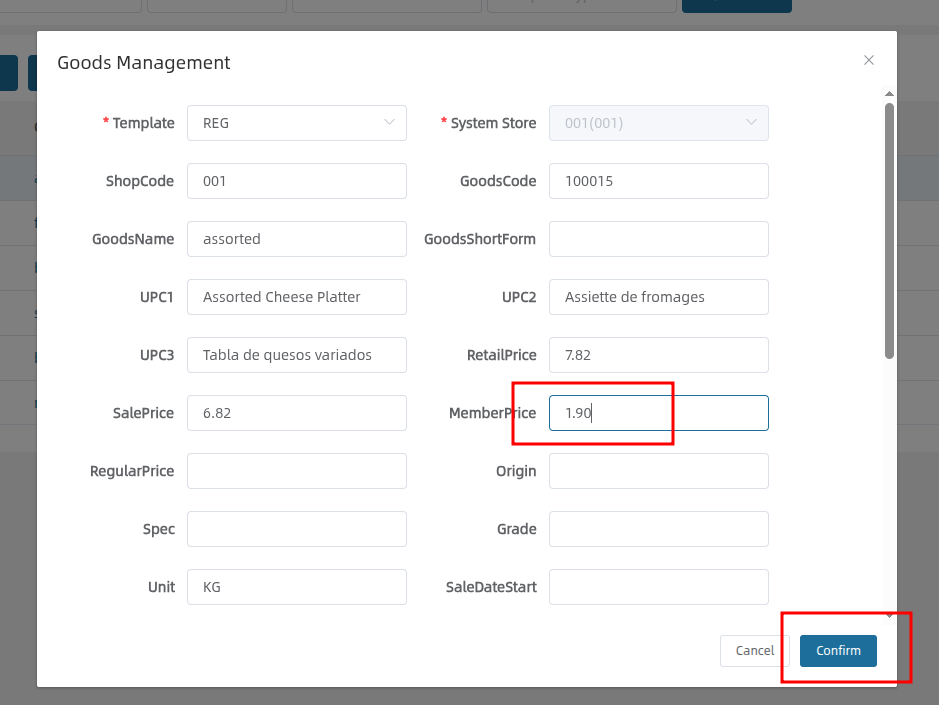
The ESL tag will be updated
Guide of the AP

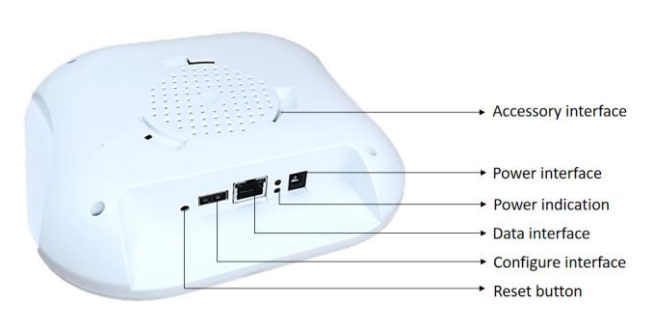
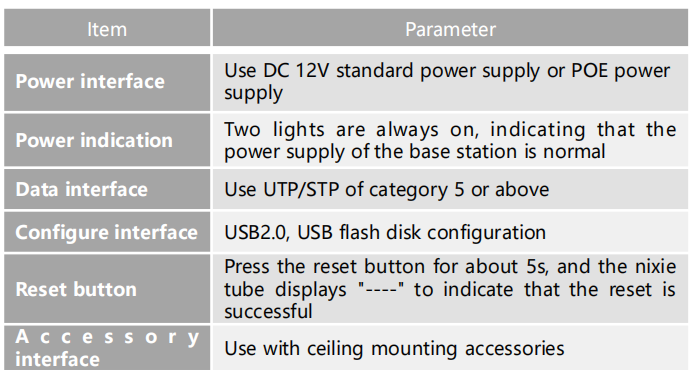
Status indicator
Blue LED: Power indicator
Red LED: Work indicator
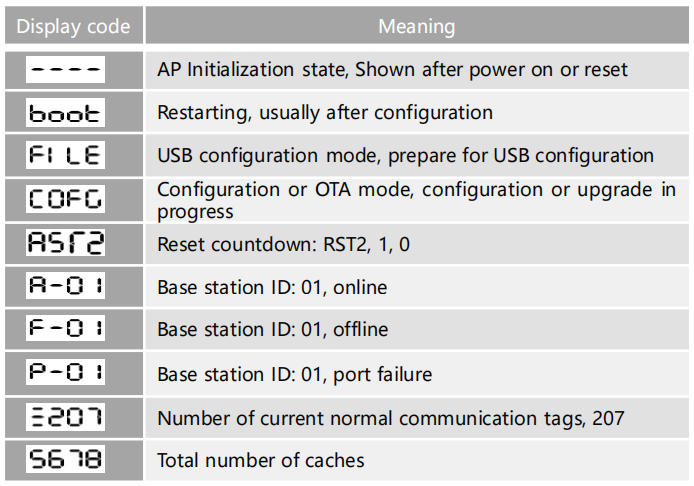
Indicator nixie tube
Assuming the ID of the AP is set to 01, its nixie tube may display the following
Important Note
- The account you have been using is our public cloud service. Cloud service for the ESL Demo Kit is provided free of charge, for as long as we continue to operate and offer the ESL cloud platform.
This allows you to:
Start using the ESL system immediately without deploying your own server.
Test all software features risk-free.
2.This document is to help customers quickly test our ESL samples and it is not a comprehensive instruction manual.
To get the detail user manual, please contact our support at support@effirox.com


